00:00
MARTHA HOLLOWELL ORCUTT: Creating new lighting fixture
00:03
families from a base file.
00:05
In this video, we're going to create two separate but similar
00:09
lighting fixtures using a face-based family
00:12
file that's been set up with the correct parameters.
00:16
We will nest in the fixture geometry
00:18
and apply the correct photometric IES file
00:22
to complete the fixtures.
00:25
I have two lighting fixture families open
00:28
that contain just the fixture part of the element.
00:31
One has square geometry and the other
00:34
has some circular geometry to it.
00:38
Now I want to create new lighting fixture families
00:40
by nesting in the geometry families
00:43
into a previously created base file.
00:46
So I have here my template file as you can see here.
00:50
This contains the light source, the electrical connector
00:53
as well as the necessary parameters.
01:02
So first of all, I'm going to save as, file save as a family,
01:09
and I'm going to go ahead and name it lighting fixture
01:13
circular surface mount.
01:21
I'm also going to go ahead and open the raft level
01:24
view before I do anything else.
01:28
Next, I'm going to go into my circular fixture geometry
01:31
and loaded into the project.
01:35
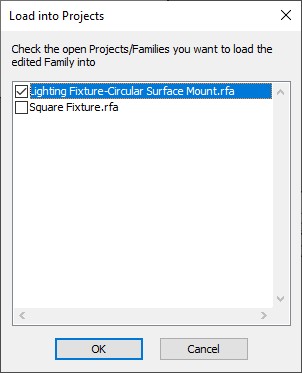
So in the load into projects dialog box,
01:37
I select my new name, click OK.
01:43
And you can see, it always wants to place it
01:45
on the vertical face, not sure exactly why.
01:48
But what I want to do in this case
01:50
is place this fixture on the work plane.
01:53
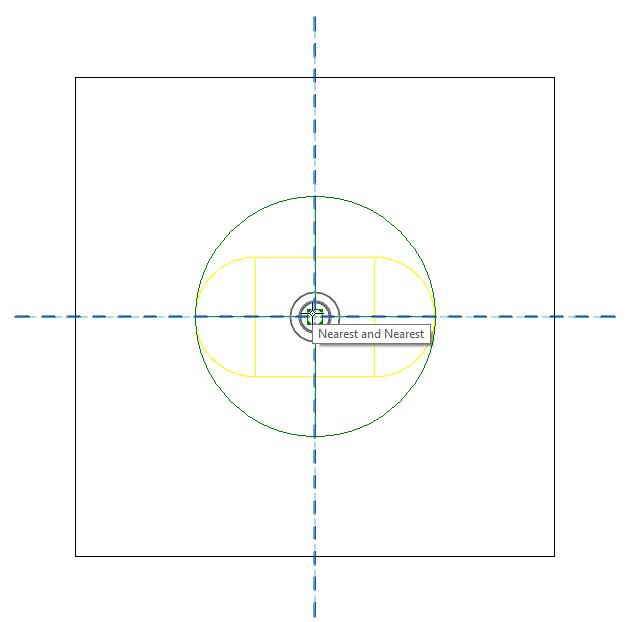
So I come in here and I'm clicking on my intersections
02:01
And you can see in my front view that I
02:04
do have my electrical connector in the right place
02:07
but I know my light source isn't right yet.
02:10
So first of all, I need to place the light source
02:13
on the edge of the light fixture.
02:15
The light source won't go through any kind
02:19
So I am going to align that, I'm clicking align,
02:23
selecting the top of my lighting fixture,
02:27
and then I'm pressing tab to make sure
02:29
that I'm getting the shape handle
02:31
or the reference line of my light source.
02:33
And then I'm going to go ahead and lock that into place.
02:38
The next thing I need to do is actually change
02:42
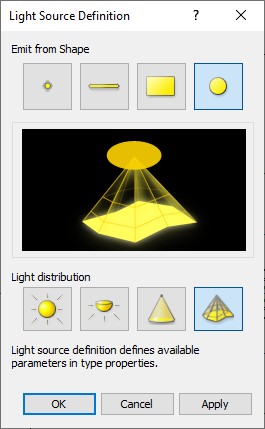
I'm going to light source definition
02:45
and I want this to be a photometric web.
02:49
So I'm going to select that and click OK.
02:52
It's still not quite right and what I need to do
02:55
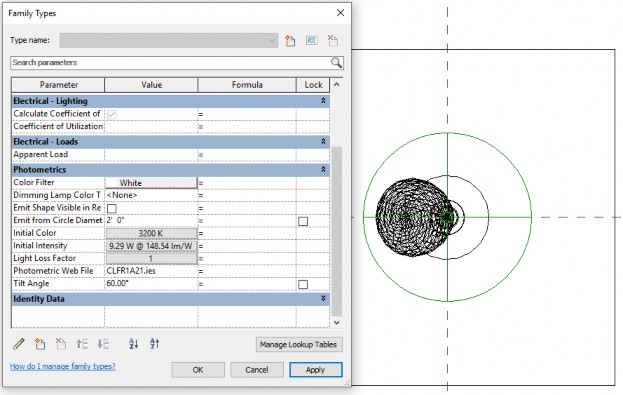
is assign the correct web.
02:57
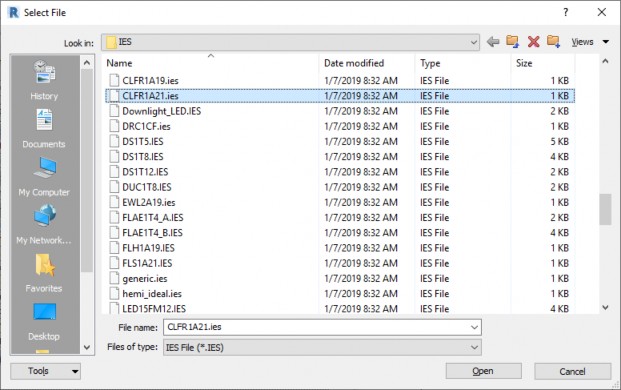
To do that, I go into family types,
03:00
scroll down to my photo matrix, and select my photometric web
03:05
file, and click the browse button.
03:09
This opens a list of the IES files that come with Revit.
03:13
IES files are typically provided by the lighting manufacturer
03:16
to match the specific fixture you're creating.
03:20
The IES file includes the intensity
03:22
of the light source and the geometry of how the light comes
03:25
out of the lighting fixture.
03:28
Now I happen to know that I want to use this particular fixture
03:31
right here so I'm going to go ahead and select that one
03:38
I'm going to click apply so you can see the photometric web
03:42
It's not in the right angle so I'm going to come and change
03:45
my tilt angle to negative 90.
03:48
Remember that when you're working
03:50
with a face-based family, you're kind of upside
03:52
down so I apply that.
03:54
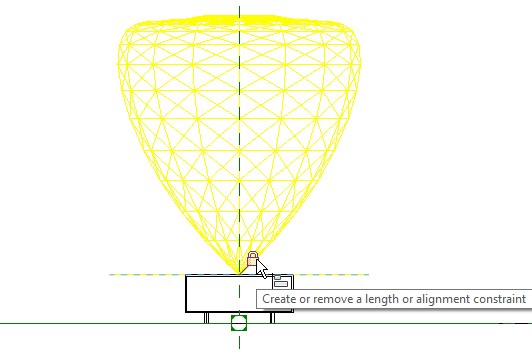
And yes, that's got the right place so I'm going to click OK.
04:00
You can check my raft level.
04:02
I'm going to also look at my 3D view of this.
04:05
So I now have my first light fixture
04:08
that has all the different parts set up so that I have my model,
04:14
I have my photometric web file set up, I have my connector.
04:20
Everything's ready for this particular one
04:23
so I'm going to go ahead and save it.
04:26
So let's start another one.
04:28
It's going to be very, very similar to this one
04:30
so I'm going to file save as this family
04:33
and I'm actually going to come in here
04:35
and change it from circular to square so my lighting fixture
04:39
square surface mounted.
04:43
Next, I'm going to unlock the light source
04:46
from the nested light fixture and then
04:49
I'm going to delete the light fixture.
04:53
I'm going to go into my square fixture geometry,
04:57
copy that into my new family file,
05:01
place it on the work plane, and let's
05:06
take a look at the front view.
05:08
There it is, I want to go ahead once more
05:10
and align this so I'm going to select
05:13
the top of my light fixture, my light source,
05:16
and lock that in place, save it.
05:23
And I've actually got my next light fixture already
05:27
because it uses the same light source photometric file.
05:32
Now you can see how efficient it is
05:34
to create light fixtures using a face-based template base
05:38
file that includes the light source, electrical connector,
05:42
and necessary shared parameters.
05:45
And then you can nest in the appropriate fixture geometry.