Validate and import Advance Steel data in Autodesk Revit - Exercise
Task 1: Export the SMLX file from Advance Steel
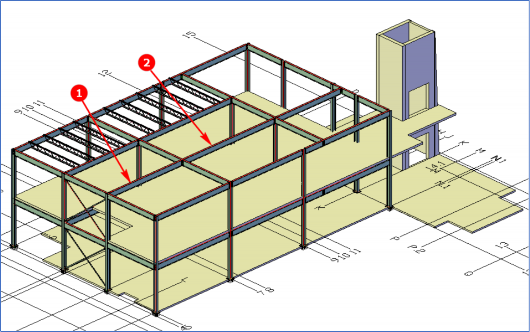
Start Advance Steel 2021 and open the Medical-Center-Documentation.dwg file that you saved in the previous objective.
Note: This file should have the two extra beams labeled as 1 and 2 in the following figure and the connections applied to them. These two beams were imported during synchronization with the revised Revit model in the previous objective.
Press ESC to make sure nothing is selected.
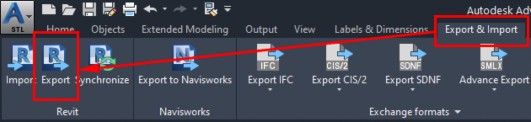
From the Export & Import ribbon tab > Revit ribbon panel, click Export, as shown in the following figure. The Save As dialog box is displayed.
Save the SMLX file with the name Medical-Center-Documentation-AS.smlx.
Task 2: Validate the Advance Steel detail model with the design model in Autodesk Revit
Start Revit 2021 and open the Medical-Center-Structure-Design-V2.rvt file.
From the Add-Ins ribbon tab > Advance Steel Extension ribbon panel > Advance Steel Extension flyout, click the Synchronization button, as shown below. The Synchronisation dialog box is displayed.
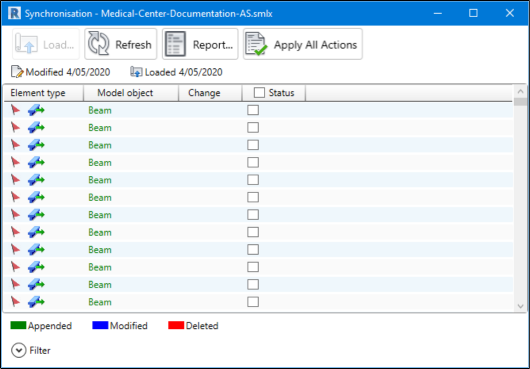
In the Synchronisation dialog box, click the Load button and load the Medical-Center-Structure- Design-AS.smlx file you exported in the previous task. The Synchronisation dialog box shows various beams listed in green, suggesting that they were added in the detailed model in Advance Steel.
From the bottom left in the dialog box, click Filter. The dialog box is expanded and various filters are displayed.
Click the Clear All button to clear all the filters.
From the Elements area, select the Column and Beam check boxes.
From the Changes area, select the Appended check box.
Click Apply Filter. All the beams and columns that are not available in the Revit model are listed in the dialog box in Green.
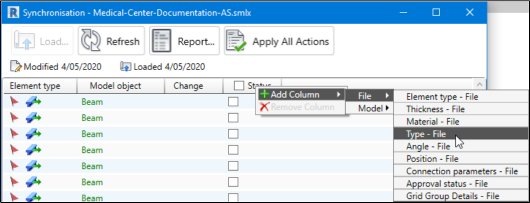
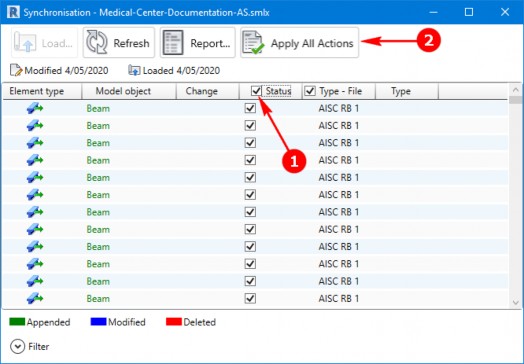
In the dialog box, right-click on the Status column and select Add Column > File > Type – File, as shown below. The Type – File column is added.
Similarly, right-click on the Type – File column and select Add Column > Model > Type. The Type column is added in the dialog box.
Notice the sections displayed as appended in the Type – File column are the bracing and joist sections that are not available in the Revit model. You will now add these columns.
Select the check box in the Status column name labeled as 1 in the following figure and click the Apply All Actions button labeled as 2 in the following figure. The process of adding the joist and bracing sections in the Revit model starts.
From the Changes area at the bottom in the dialog box, clear the Deleted check box, and select the Modified check box.
Click Apply Filter. The dialog box shows a list of items that are modified.
Review the Change column and notice that these changes are about material, suggesting the material names are different in Advance Steel and Revit. You can ignore these changes.
Task 3: Import connections from Advance Steel
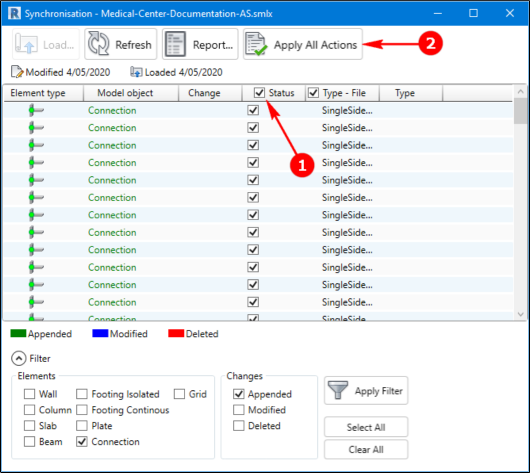
With the Synchronisation dialog box still opened, clear the Column and Beam check boxes from the Elements area.
Select the Connection check box from the Elements area.
From the Changes area, select the Appended check box.
Click Apply Filter. All the connections that were added to the detailed model in Advance Steel are listed in the dialog box.
Select the check box in the Status column name labeled as 1 in the following figure and click the Apply All Actions button labeled as 2 in the figure below. The process of importing all the connections begins.
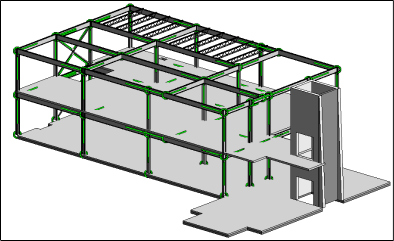
Once all the connections are imported, close the dialog box. The connections are displayed in green lines and circles, as shown below.