00:01
Database Annotation. Now, that's not a term you hear very often in Revit.
00:05
But, in effect, it describes very well how the backend relational database that underlies the Revit project works.
00:14
Elevation markers, section markers, column bubbles, callout bubbles, we know all about these in Revit,
00:21
and how they magically know which sheet they belong on.
00:24
In this video, we will actually open up the hood to see how that magic works. This is Revit.
00:31
This is BIM. This is a relational database that underlies BIM.
00:36
So let's have a look at these elevation markers, section markers et cetera, and how it all works.
00:43
We'll continue on with Revit with the project that we had already started.
00:49
So here in Revit 2024 in our recent files, let's click on our small medical center.
00:56
Look, it opens up in our project page.
00:58
That's because we said that to our starting page in the last video.
01:03
So in the Project browser, let's go up to our Floor Plans,
01:08
second floor floor plan, double click to activate that.
01:13
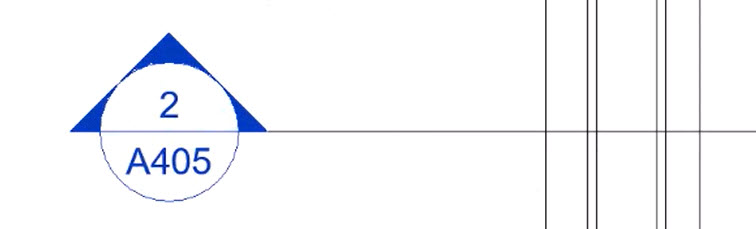
And you notice down here we have this section marker.
01:18
It's in blue, which means it's a hyperlink.
01:22
And it says it's number two, which means it's detail number two on sheet A405.
01:30
Let's just verify this.
01:33
We'll go down to Sheet 405, double click to open it.
01:38
And there, indeed, is view number two, which is our longitudinal building section.
01:45
You notice that the section marker is in blue, which means it's a hyperlink, which means I can double click on it.
01:53
And it's going to go to the longitudinal building section view.
01:59
Now, in that, there are other hyperlinks.
02:01
For example, this is one of A402. Let's have a look at that.
02:09
We go to A402, which are sections.
02:14
And here is drawing number one, and it is indeed that.
02:23
All these markers that are populated means that they are currently reside on a sheet.
02:28
The ones that are blank means that they are not yet placed on a sheet.
02:32
Let's go back to our longitudinal building section, and with nothing selected, it's telling me what the sheet number is.
02:40
The sheet name is the referencing sheet, which is A101, and the referencing detail,
02:48
not only that, but these are grayed out because we cannot change them Revit and its relational database will take care of that.
02:58
Now, how does it actually do that?
02:60
So let's again, open up the hood to inspect what is happening with these particular markers.
03:07
It will take some digging to get to the actual family that represents this.
03:13
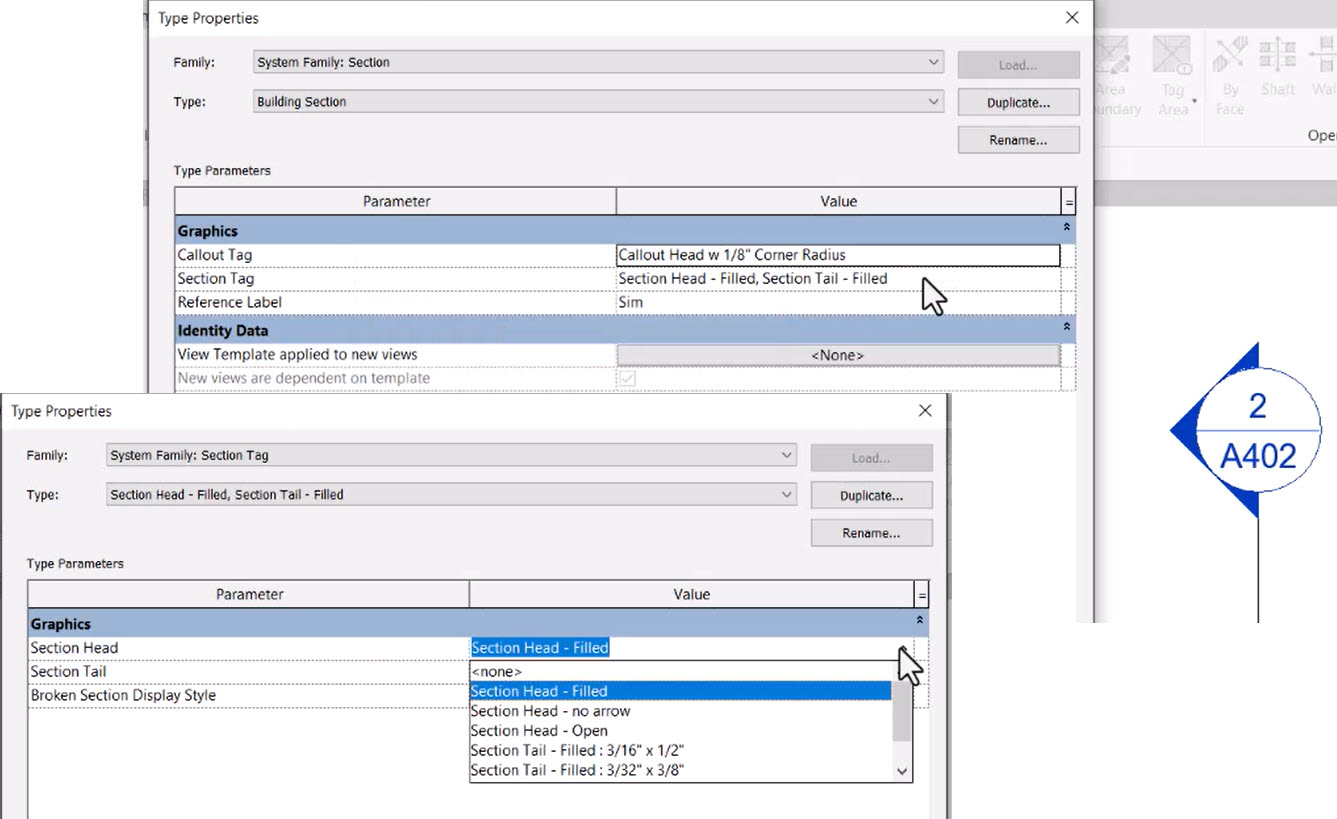
So I select the section marker, I go to edit type in my properties, and we see that there's a callout tag and a section tag,
03:22
the section tag is section head filled, and I could actually change that to a variety of other section hits.
03:31
We'll leave it at section head field, and that's the one we want to investigate.
03:36
So I'm gonna back out of this canceling, and let's go open up that section head field.
03:43
So we go to the file tab, and open, and we want to open a family.
03:50
Now, it's telling me that I don't have the content downloaded yet, and it tells me if I require local access,
03:58
then I need to visit this particular download page. So let's do that.
04:05
So I go to my browser type in autodesk.com Revit content and we are looking for the Revit 2024 content.
04:14
Here, we search out US English Content v1 for Revit 2024,
04:22
and I download the executable file.
04:28
The extraction and installation takes some time.
04:32
And once downloaded we can continue. Okay, the installation is complete.
04:40
Let's try going back and opening that again. My file pull down. I want to open a family.
04:47
Now we have the complete library for the US, and we're looking for this section. Okay, great.
04:56
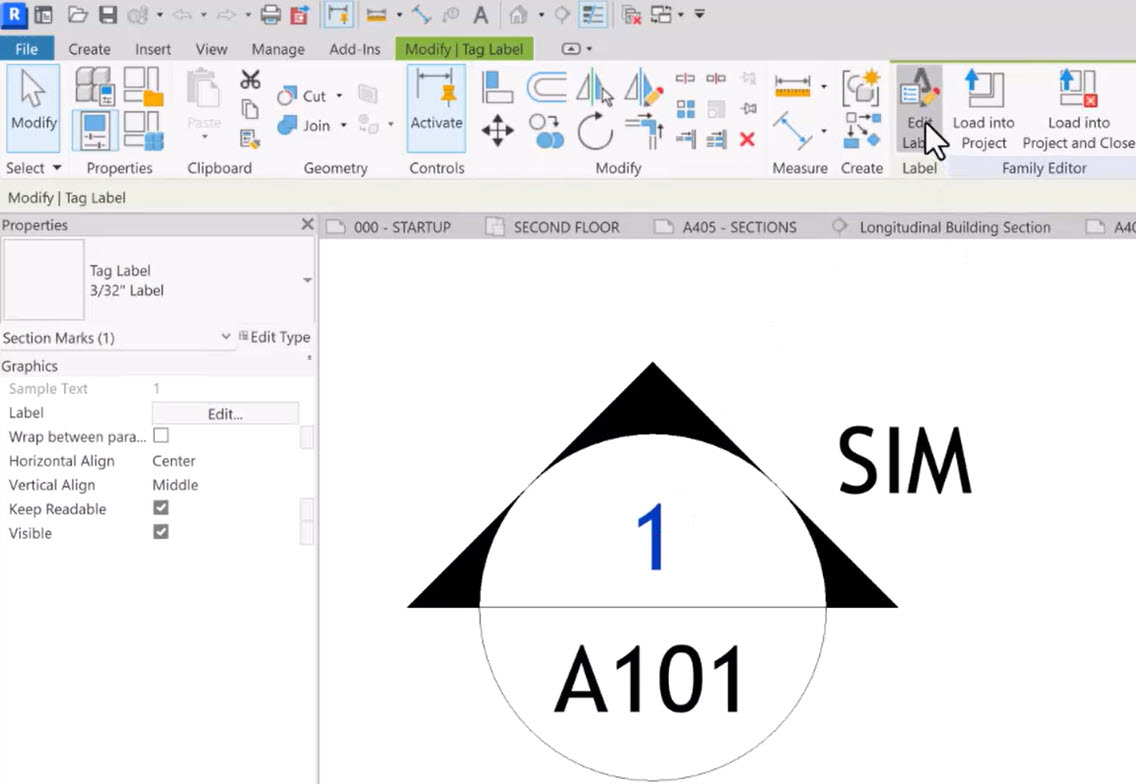
So this is the Revit family of that section marker with a filled head.
05:02
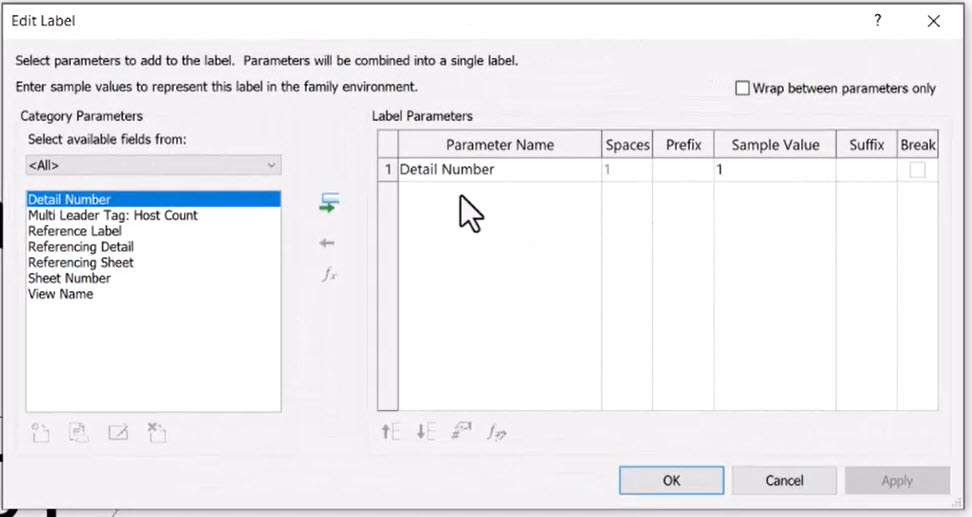
If I click on this one here, I can edit the label, and look, this is where it happens.
05:09
So this one represents the detail number, and the detail numbers,
05:14
part of that relational database that we were talking about.
05:18
I'm gonna cancel this because I don't wanna make any changes.
05:21
Let's look at A101. What is that? I click on edit label, and it is the sheet number.
05:30
So you start to understand that this sheet number is part of the database for the sheets within Revit,
05:36
and the section marker refers to that sheet number.
05:40
And it is this sheet number that is also part of the sheet schedule.
05:46
I click cancel. Now, if I wanted to, I could actually change the geometry of this marker.
05:52
But in this case, we're just going to close out of this. We haven't made any changes.
05:57
All I wanted to show you was how Revit works underneath the hood for this relational database
06:04
as it references drawings and sheets across the entire project.